Contact sharing cross-platform
How to share contacts between Gmail, Outlook, and iOS devices? Millions of companies are asking the same question, looking for the most efficient way to share company address books cross-platform. This guide will outline several methods you can use to share your contacts between Gmail, Outlook, and iOS devices both manually and automatically.
How to share contacts between Gmail, Outlook, and iOS devices? Millions of companies are asking the same question, looking for the most efficient way to share company address books cross-platform.
This guide will outline several methods you can use to share your contacts between Gmail, Outlook, and iOS devices both manually and automatically..
Table of Contents:
- What is Contact sharing: considerations and limitations
- Share Google contacts manually
- Share contacts in Outlook manually
- Share contacts in iPhone (or any Apple device) manually
- Automatic Contact Sharing with SyncGene Enterprise
- How to share Contacts automatically with SyncGene Enterprise
- Join SyncGene Enterprise!
What is Contact sharing: considerations and limitations
The process of contact sharing means giving another user access to your address book. It is a form of knowledge sharing and can be significant to any company that looks after its workers’ productivity. By getting access to certain information – like corporate address books or calendar events – employees can improve performance and reach their goals quicker.
Usually, there are a few ways to share contacts in Gmail, Outlook, or iCloud.
Some platforms (like Google) allow sharing contacts via a CSV file. Users will export contacts from one account onto the CSV file and import them to another. The main benefit of this solution is that users can pass the file over to anyone they want, no matter if they are inside or outside the organization.
This will have to be done manually though, meaning that contacts will never be up-to-date in real-time.
Other platforms (like Outlook) allow delegating access and inviting people to view a chosen contacts folder. Depending on given permissions, users can not only view but even add and update the contacts themselves.
The drawback to this solution is that you might not have the access to invite people outside your organization. Also, the shared folder will not be visible on mobile devices.
We found that to fully benefit from contacts sharing, companies are considering third-party tools that automate the data sharing process, reducing the risk of data loss and saving lots of time.
Next, we will look through the process of manually sharing contacts in Gmail, Outlook, and iOS devices. If you want to know how to do it automatically, scroll straight to the “How to share Contacts automatically with SyncGene Enterprise” section.
Share Google contacts manually
The fact is: there is no way to share Google contacts automatically. You will have to do it the old-fashioned way – by exporting contacts from one account and importing them to another manually. Here is how to do it.
- Exporting contacts from Gmail
Step #1. Log in to Google Contacts with your Google account. Before exporting, you can organize your contacts into groups with labels.
You can drag and drop contacts to groups or assign groups in contact settings.
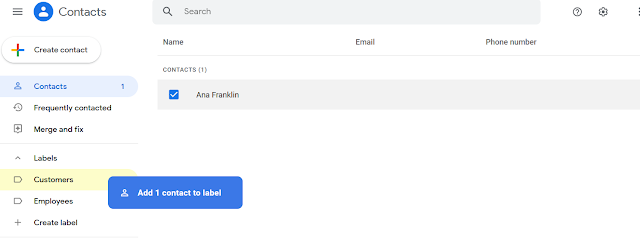
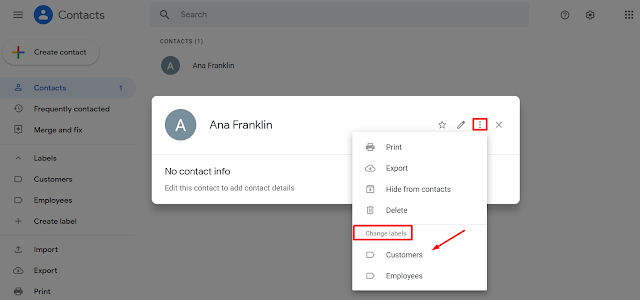
Step #2. When your groups are ready, click the “Export” button on the left panel.
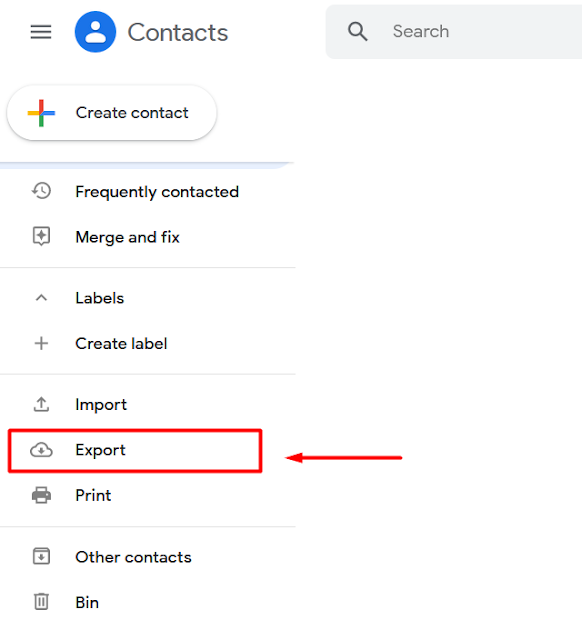
Step #3. In the drop-down menu, select which contact group you want to share with others. Or select “Contacts” to get everyone. Then, choose the file format (e.g., Google CSV) and click “Export”.
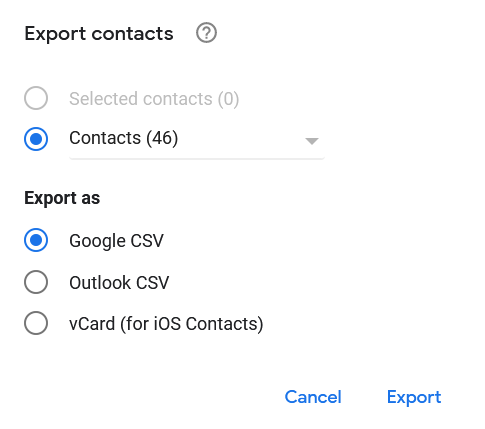
Step #4. Save the .csv file to your device.
This is how you export contacts from your Gmail account. Now, you can send the file to any person you want.
Next, we will show you how to import the file to your Gmail account.
- Exporting contacts to Gmail
Step #1. Log in to Google Contacts with your Google account.
Step #2. Import the contact list by clicking on “Import” and then selecting the CSV file that you have received.
You can also add labels, to separate the shared contacts from your original list.

Step #3. Now, you will see Contacts that were shared with you in your Gmail account.
Note that the two Google accounts are not kept in sync while transferring data manually. That means that if you enter any new contact into your Gmail account, it will not be visible to people with whom you have shared the contacts.
If you want to share Google contacts automatically and make updates in real-time, see the “How to share Contacts automatically with SyncGene Enterprise” section.
Share contacts in Outlook manually
Users with Exchange Server accounts can share contact folders with any person who is also using an Exchange Server account in the same organization. Here’s how to do it.
Step #1. Find the “People” tab in the bottom panel to manage existing contacts into folders. Find “Folder” to create new folders or just select the one that you want to share with others.
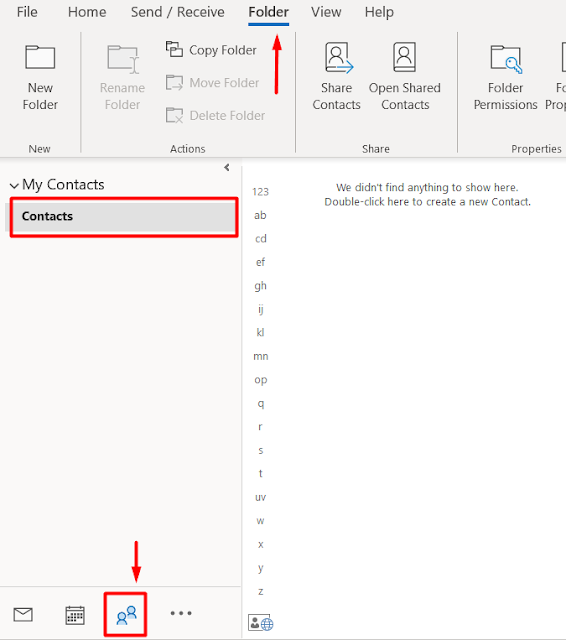
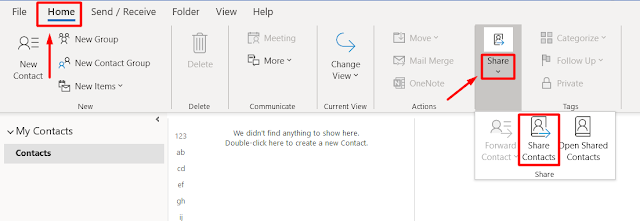
Step #2. When your contacts folders are set up, go back to “Home”, click on the “Share” group and then “Share Contacts”.
Step #3. A sharing invitation pops-up. In the “To” box, enter the name of the recipient. If you want to, you can adjust the subject and the message.
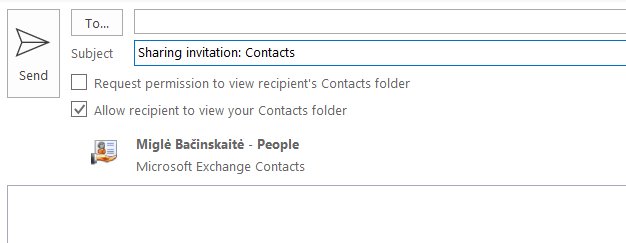
You can also request permission to view the recipient's default “People” folder. To do so, select the “Request permission to view recipient's Contacts folder” check box.
Step #4. In the message body, type any information that you want to include, and then click “Send”.
Step #5. You are all set! The recipient will receive your sharing invitation via email.
Sharing Contacts this way in Outlook also has several limitations to consider. The shared contacts folder will only be visible with the desktop Outlook version. Users will not be able to access them via a mobile device.
If you are using Office 365 and have all contacts in the cloud, you will share Outlook contacts without limitations with SyncGene. Go straight to the “How to share Contacts automatically with SyncGene Enterprise” section to learn how to do it.
Share contacts in iPhone (or any Apple device) manually
One of the easiest ways to share contacts between iPhones and other Apple devices is by using the Contacts app.
Step #1. Open the Contacts app on your Apple device to choose the contact that you want to share.

Step #2. In your contact settings, find the “Share Contact” option.
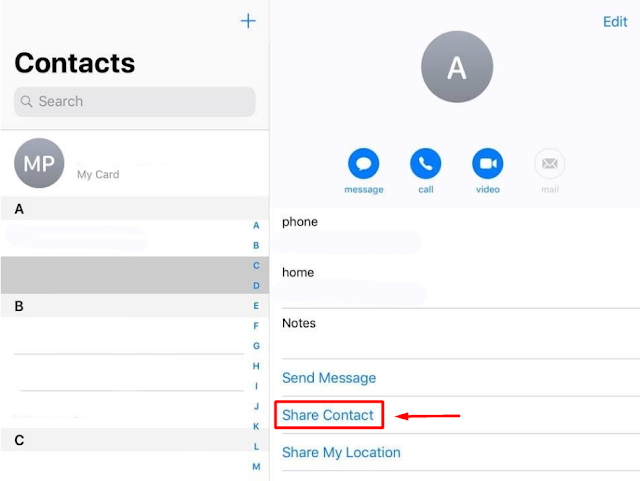
Step #3. Choose how you will share the specific contact – via message, mail, IM apps, AirDrop, etc.

Step #4. Whichever option you choose, the system will launch the application and attach the contact automatically. Enter the recipient and adjust the message, if needed.
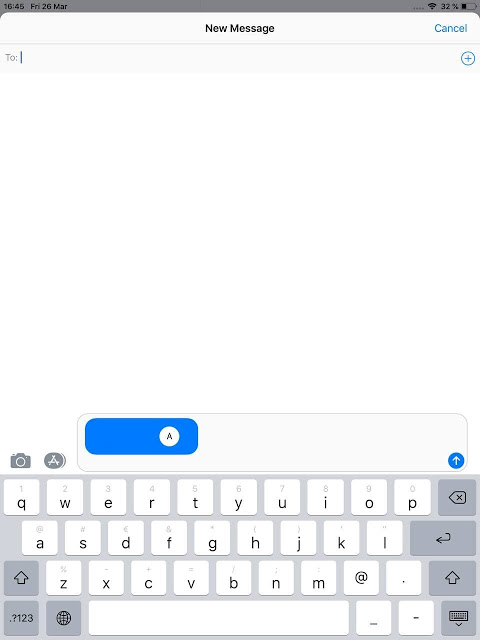
Step #5. When your delegated person received the contact, he will be able to save it to his/her device.
The main drawback of this solution is that there is no convenient way to share multiple contacts. If you are switching to a new smartphone, for example, sharing individual contacts can be a tedious task.
Go straight to the “How to share Contacts automatically with SyncGene Enterprise” section and learn how to avoid ineffective ways while sharing your contacts.
Automatic Contact Sharing with SyncGene Enterprise
With no extra requirements or complicated set-ups, it’s not difficult to manually share contacts in Gmail, Outlook, or iOS devices. You could even say it’s simple.
However, this applies only if you have one or two contacts to share. With more of them, the process can cause a serious headache.
Luckily, SyncGene is here for you. Create a single list for all company contacts in seconds!
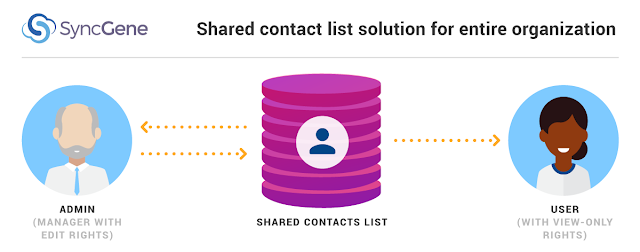
Try out SyncGene Enterprise to share and edit Contacts with your team on Google, iCloud, and Office 365.
- Bridge the gap between your Android or Apple smartphones, tablets, PCs, and smartwatches.
- Connect as many people as you want – whether it’s 10 or 10,000.
- No need to install anything.
- Available for all SyncGene Enterprise users.
With contact sharing in place, contact management is automated on an enterprise level. If a new contact is entered into the database, this information shows up on all connected sources.
Want to learn more? Read our article on how SyncGene shared contact list solution helped Enterprise to save time. Or follow our instructions below!
How to share Contacts automatically with SyncGene Enterprise
Step #1. Have an active SyncGene Enterprise plan.
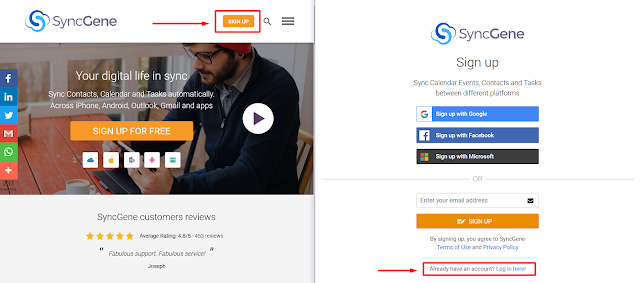
Step #2. Go to SyncGene and log in and select “Admin Panel” located under your profile information.

Step #3. Select “Members” to add users into SyncGene Enterprise account and set up at least 1 source for each member.

Step #4. Select “Share Setup” to manage Contact folders. Click “Setup Centralized Folders” to create a new one.

Step #5. Create the name of your Contacts folder and choose which member from your Enterprise account will access the list. Select “All Contacts” to include them all.
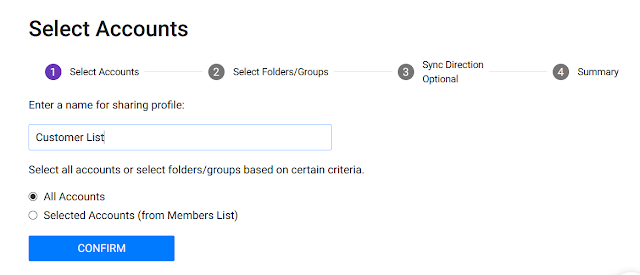
Step #6. Select which Contact folders will be added to the list. Choose “Default Contacts folder/groups” to take all Contacts from selected sources.
If you need to take Contacts from a specific folder, select “Custom Contacts folder/group” and enter its name.
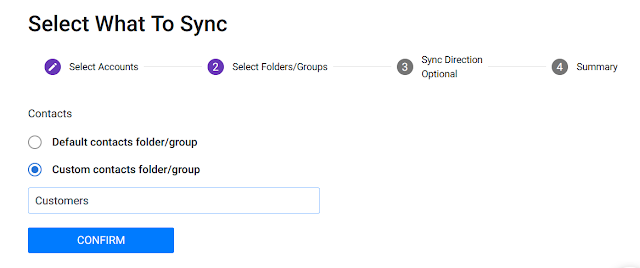
Click “Confirm” to move forward.
Step #7. Select which members from your Enterprise account can edit the Contacts list, and who can view the list only without permission to make changes. You can determine these permissions by setting the synchronization direction.
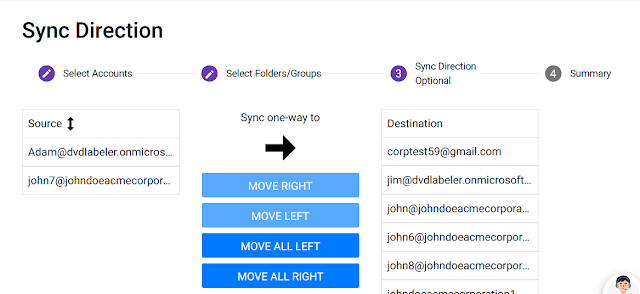
All members on the left column will be able to make changes to the Contacts list. Members on the right column can only view the Contacts. Change permissions by moving each member right or left.
When you are all set, click “Confirm” to move forward.
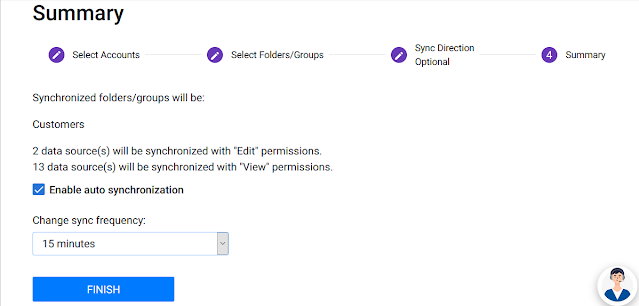
Step #8. Review your settings and click “Finish”.
Join SyncGene Enterprise!
And that is it! Now you know how easy it is to share Contacts cross-platform with SyncGene Enterprise. Try SyncGene Enterprise Contacts sharing solution with your team and work more efficiently as a unit.
What are you waiting for? Check SyncGene Enterprise now!
If you have any questions, visit our website or start a Live Chat and we will be happy to help.
Read more:


%20white.svg)
.svg)